


How Much Does It Cost To Rent A Limo?
Renting a limo is a luxurious way to travel for special occasions, whether it’s for a wedding, a prom night, or an important business event. But how much does it cost to rent a limo? The price of limo hire can vary depending on several factors, including the type of limo, the duration of hire, and the location.

In this article, we will break down the various elements that impact limo rental costs, as well as provide a rough idea of what you can expect to pay when hiring a limo in Australia.
For a more detailed breakdown and to get help with planning your next limo hire, feel free to visit my website.
What Affects The Cost Of Renting A Limo?
Several factors influence limo hire prices. Understanding these will help you estimate the cost more accurately before booking your ride. Here are some of the key factors that affect the cost of renting a limo:
Type Of Limo
One of the most significant factors that influence the price of limo rental is the type of limo you choose. Limousines come in different shapes, sizes, and styles. The more luxurious the limo, the higher the cost. Here are a few common types of limousines:
- Stretch Limo: Ideal for large groups or special occasions, this type of limo typically costs more due to its size and elegance.
- Hummer Limo: A larger and more extravagant option, perfect for events where you want to stand out. Hummer limos usually come with a higher price tag.
- SUV Limo: A slightly more affordable option than the Hummer limo, but still provides ample space and luxury.
- Sedan Limo: A classic, elegant choice that tends to be more affordable than the stretch or Hummer limo.
Duration Of Hire
The amount of time you need the limo will also affect the cost. Most limo services have a minimum hire period, usually around 3-4 hours. However, the longer you hire the limo for, the more you can expect to pay.
Rental costs often follow an hourly rate, but for longer rentals, some companies may offer discounted rates. If you’re hiring the limo for a one-way trip, that can also impact the price.
Distance Travelled
The distance you need to travel will also influence the overall cost. Longer distances will require more fuel, and as a result, may increase the rental price. Some limo hire companies charge extra for extended travel distances or for trips that take you outside of a certain radius. Be sure to ask about additional fees when booking your limo.
Time Of Year
The time of year you book your limo can also affect the price. For instance, booking a limo for a wedding or prom season, which are peak times, may come with higher prices due to high demand. On the other hand, booking during the off-season or on weekdays when demand is lower may result in more affordable rates.
Special Events And Extras
If you’re renting a limousine for a special event, such as a wedding or birthday, consider adding additional services like champagne, decorations, or a red carpet service. These extras can add to the overall cost. Additionally, if you require specific amenities, such as a sound system, lighting, or entertainment systems, the price may increase.
How Much Does It Cost To Rent A Limo In Australia?
The cost of renting a limo in Australia can vary depending on the factors mentioned above. On average, you can expect to pay between $150 and $350 per hour for a standard stretch limo. Here’s a more detailed breakdown of limo hire costs in Australia:
Stretch Limousine Rental
- Hourly Rate: $150 – $250 per hour
- Wedding Hire: $800 – $1,500 for 5-6 hours
- Prom or Party Hire: $200 – $350 per hour
Stretch limousines are ideal for groups or special occasions. They offer ample space and come equipped with luxurious features, including plush seating, entertainment systems, and more. Expect to pay more for weddings and proms, especially during peak seasons.
Hummer Limousine Rental
- Hourly Rate: $250 – $400 per hour
- Wedding Hire: $1,200 – $2,500 for 5-6 hours
- Prom or Party Hire: $350 – $450 per hour
Hummer limos are larger and more extravagant, and their rates reflect this. Hummer limos typically have seating for up to 16 passengers and come with advanced sound systems, LED lighting, and other luxury features.
SUV Limousine Rental
- Hourly Rate: $180 – $300 per hour
- Wedding Hire: $900 – $1,800 for 5-6 hours
- Prom or Party Hire: $250 – $350 per hour
SUV limos offer a good balance between luxury and cost. They’re larger than sedan limos but more affordable than Hummers, making them a popular choice for group events and parties.
Sedan Limousine Rental
- Hourly Rate: $120 – $200 per hour
- Wedding Hire: $500 – $1,200 for 5-6 hours
- Prom or Party Hire: $150 – $250 per hour
Sedan limousines are the most affordable option, making them a good choice for those who want to add a touch of luxury to their event without overspending.
Additional Costs And Fees
While the rental cost will cover the basic services, there may be additional costs that you should be aware of when hiring a limo. Some of these may include:
Fuel Surcharges
If you’re travelling a long distance, you may be subject to fuel surcharges. The limo service will typically charge extra if your rental requires a significant amount of fuel to cover the distance.
Tolls And Parking Fees
If the limo needs to drive through toll roads or park in expensive areas, these costs will often be added to your bill. Be sure to confirm with the company about tolls and parking fees before booking.
Gratuity For The Chauffeur
It is customary to tip the limo driver at the end of your journey. The tip is usually around 10-20% of the total rental cost. Some limo hire services may include the gratuity in the bill, but it’s always good to ask ahead of time.
Extra Hours Or Extended Time
If you need the limo for longer than the original booking, you may incur additional charges for the extra hours. This rate will vary depending on the company and the type of limo.
Conclusion
The cost of renting a limousine in Australia can range from $120 to $450 per hour, depending on the type of limousine, duration of hire, and any additional services. The key factors to keep in mind when estimating the cost of limo hire are the type of limo, the length of your rental, the distance to be travelled, and the season in which you’re booking.
By understanding these elements and following a few tips to save money, you can enjoy a luxurious limo experience without breaking the bank.
Frequently Asked Questions
What Is The Average Cost Of Renting A Limo In Australia?
The average cost of renting a limo in Australia can range between $150 and $350 per hour, depending on the type of limo and the duration of hire. For larger, more extravagant vehicles, such as Hummer limos, prices can reach as high as $400 per hour. Standard options, such as sedan limos, are more affordable, with hourly rates starting around $120.
Are There Any Hidden Fees When Renting A Limo?
Yes, there may be additional charges not included in the base rental price. These can include fuel surcharges for long-distance trips, tolls, parking fees, and gratuity for the chauffeur, typically 10-20% of the total bill. It’s important to confirm these potential fees with the limo service before booking.
How Can I Save Money When Renting A Limo?
To save money when renting a limo, consider booking early, as rates tend to rise closer to the date of your event. Shopping around and comparing prices from different providers can help you find the best deal. Additionally, opting for a standard limo or choosing off-peak times for your rental can also reduce costs.
How Can You Make The Most Of Your Dental Treatment Experience?
Dental treatment can sometimes feel daunting, especially when unsure what to expect. Whether you’re a first-time patient or someone who regularly visits the dentist, understanding how to make the most of your dental treatment experience can help you feel more at ease and ensure you get the best care possible. By taking proactive steps and being informed, you can enhance your visit and make it more comfortable and practical.

This article will explore key strategies for maximising your dental treatment experience. These tips will help you prepare for your appointment, communicate effectively with your dentist, and ensure a positive outcome.
This is a great post to read for more helpful information and tips.
Prepare For Your Appointment
The first step in maximising dental treatment experience is being well-prepared before your appointment. Proper preparation can reduce anxiety, help you understand the treatment plan, and ensure the dentist has all the necessary information to deliver the best care.
Review Your Dental History
Before visiting your dentist, review your dental history. This includes any past procedures, treatments, and allergies to medications or anaesthetics. Understanding your dental history can help your dentist offer more personalised care and avoid potential complications.
Make A List Of Questions Or Concerns
Make a list before your appointment if you have any questions or concerns about your oral health or the proposed treatment. This will ensure you don’t forget anything important during the consultation. Asking questions allows you to participate actively in dental care and helps you understand your treatment options.
Schedule The Right Time
When booking your appointment, choose a time that fits well with your daily schedule. Avoid scheduling it during a hectic time, as stress can affect your experience. A relaxed, comfortable state will help you have a more pleasant visit and allow you to absorb all the necessary information.
Communicate Effectively With Your Dentist
Effective communication between you and your dentist is critical for a successful dental treatment experience. Being open and clear about your needs and concerns ensures you receive appropriate care.
Be Honest About Your Dental Fears
If you feel nervous or anxious about your dental treatment, don’t hesitate to share this with your dentist. Many dental professionals are trained to handle dental anxiety and can offer solutions such as sedation options or relaxation techniques to make your experience more comfortable.
Ask For A Detailed Treatment Plan
Understanding the specifics of your treatment plan is essential. Request that your dentist explain each step of the procedure, its necessity, and the expected outcomes. This can help reduce fear of the unknown and ensure you are fully informed about your treatment.
Discuss Payment Options
Dental procedures can sometimes be expensive, so discussing payment options with your dentist is essential. Many clinics offer payment plans or accept insurance, which can make the financial side of your treatment less stressful. Knowing the costs beforehand can also help you make informed decisions about the care you want to pursue.
Build A Relationship With Your Dentist
Establishing a trusting relationship with your dentist can significantly improve your dental treatment experience. Building rapport and confidence with your dental care provider can make your visits more comfortable and ensure better communication.
Choose The Right Dentist For You
Not all dentists are the same; finding one you feel comfortable with is crucial. Research potential dentists, read reviews, and schedule a consultation to understand their communication style and how well they listen to your concerns. The right dentist will make you feel at ease and will be responsive to your needs.
Regular Check-ups
Visiting your dentist for regular check-ups is essential for maintaining good oral health. These visits provide an opportunity to build a relationship with your dentist and ensure that any potential issues are detected early. Early intervention can save you time, money, and discomfort in the long run.
Be Open To Recommendations
A good dentist will offer professional recommendations based on your oral health and lifestyle. If your dentist suggests treatments or changes to your routine, be open to their advice. Trust their expertise and ask any questions you may have to understand the reasoning behind their recommendations fully.
Take Care Of Your Oral Health Between Appointments
Your dental treatment experience is not limited to the time spent in the dentist’s office. Maintaining good oral hygiene and following your dentist’s advice between appointments can help keep your teeth and gums healthy, preventing future issues that may require more intensive treatment.
Brush And Floss Regularly
Brushing your teeth at least twice daily and flossing daily are the most effective ways to maintain good oral health. Regular brushing and flossing help remove plaque and prevent cavities and gum disease. These simple habits can significantly reduce the number of dental treatments you need.
Use The Right Dental Products
Not all dental products are the same, and choosing the right ones can make a big difference in oral health. Your dentist may recommend specific toothpaste or mouthwash products based on your needs. Make sure to use products that are suitable for your oral health condition.
Avoid Harmful Habits
Certain habits can negatively affect oral health, such as smoking, excessive alcohol consumption, and chewing on complex objects like pens or ice. Avoiding these habits can help protect teeth and gums from damage and reduce the likelihood of needing extensive dental treatment.
Understand The Treatment Process
Understanding what will happen during dental treatment can alleviate fear and help you feel more in control. The more you know about the treatment process, the less likely you are to experience anxiety or confusion.
Understand The Purpose Of Your Treatment
Whether you undergo a routine cleaning, filling, or more complex procedure like a root canal or crown, ensure you understand the treatment’s purpose. Knowing exactly why the procedure is necessary will help you feel more confident and comfortable.
Ask About Aftercare Instructions
After your treatment, it’s essential to follow the aftercare instructions given by your dentist. These instructions may include information about managing pain, caring for your teeth, or avoiding certain foods. Proper aftercare can prevent complications and help you recover more quickly.
Use Technology To Your Advantage
Dental technology has advanced dramatically in recent years. Modern equipment can enhance the precision of treatments, reduce discomfort, and speed up recovery. Don’t hesitate to ask your dentist about the latest technology.
Digital X-Rays
Digital X-rays provide a quicker, safer, and more accurate way of diagnosing dental problems. They expose patients to less radiation than traditional X-rays and provide clearer images, allowing your dentist to identify issues early.
Laser Dentistry
Laser dentistry is a less invasive method for treating various dental conditions. Lasers can be used for teeth whitening, cavity removal, and gum reshaping. This technology is often associated with faster recovery times and less discomfort during and after treatment.
Manage Your Dental Anxiety
Dental anxiety is common, but it doesn’t have to ruin your experience. There are several strategies you can use to manage anxiety and make your treatment more comfortable.
Relaxation Techniques
Techniques such as deep breathing, meditation, or calming music can help relax your mind and body before and during dental treatment. Ask your dentist if they can play music or provide headphones to help distract you during the procedure.
Consider Sedation Options
If your anxiety is severe, your dentist may offer sedation options such as nitrous oxide (laughing gas) or oral sedatives. These can help you feel more relaxed during the procedure and ensure a more pleasant experience.
Conclusion
Making the most of your dental treatment experience involves preparation, communication, and good oral health. These strategies can reduce anxiety, ensure better care, and maintain a healthy smile.
Remember, the key to a successful dental experience is building a trusting relationship with your dentist, staying informed, and practising good oral hygiene habits between appointments. By taking a proactive approach to your dental care, you can achieve the best possible outcomes and enjoy a lifetime of healthy teeth and gums.
Frequently Asked Questions
How Can I Reduce Anxiety Before My Dental Appointment?
Try relaxation techniques like deep breathing or calming music to reduce anxiety before your dental appointment. It’s also helpful to communicate your fears with your dentist, who may offer sedation options such as nitrous oxide or oral sedatives. Being well-prepared and understanding your treatment plan can also alleviate uncertainty and make the experience more comfortable.
How Can I Maintain Good Oral Health Between Dental Appointments?
Maintaining good oral health between appointments is key to reducing the need for extensive treatment. Brush your teeth at least twice a day, floss daily, and use the right dental products recommended by your dentist. Additionally, avoid harmful habits like smoking or excessive alcohol consumption, as these can damage your teeth and gums over time.
What Should I Do If I Have Questions Or Concerns About My Dental Treatment?
If you have any questions or concerns about your treatment, write them down before your appointment. Discuss them with your dentist during the consultation to ensure you fully understand the treatment plan. Clear communication can help you feel more at ease and ensure you receive the care that best meets your needs.
How To Maintain Your Electrical Switchboard
Maintaining your electrical switchboard is essential to ensure the safety, reliability, and efficiency of your home or business’s electrical system. It is a preventative measure and a fundamental aspect of responsible property management.

Read here to discover how our services can assist you.
Step-By-Step Guide On How To Maintain Your Electrical Switchboard
Conduct Regular Visual Inspections
Start by inspecting the switchboard monthly. Check for:
- Signs of wear and tear
- Burn marks or discolouration
- Loose or frayed wires
- Water damage or rust
Any visible defects can be early warning signs of potential hazards. If you observe any of these signs, consult a licensed electrician immediately. A visual inspection is your first line of defence against faults.
Look for evidence of pests like rodents or insects, as they can chew through insulation or build nests that interfere with wiring. Also, check for outdated labelling or missing panel covers, which can compromise safety during use.
Keep The Area Clean
Dust and dirt can accumulate inside the switchboard, leading to overheating or short-circuits. Clean the area surrounding the switchboard and, if qualified, gently remove dust using a dry cloth or vacuum with a nozzle.
Avoid using water or liquid cleaners, as they can damage sensitive components. A clean environment prevents the build-up of grime that can affect performance. Cobwebs, paper, or other debris should also be cleared to reduce fire risk.
Regular cleaning should extend to the interior, provided you have the skills or are under supervision. Accumulated dust inside the cabinet, particularly around terminals and breakers, should be removed using dry compressed air. Never use metal tools or brushes near live terminals.
Test Safety Devices
Safety devices like RCDs must be tested at least every three months:
- Press the “Test” button on the RCD
- Ensure power cuts off promptly
- Reset the device afterwards
If the RCD fails the test, it must be replaced immediately. RCDs are critical in preventing electrical shocks, making regular testing non-negotiable. Document the test dates and results to maintain a record of the device’s reliability.
Create a testing checklist for homes with multiple RCDs to avoid missing any. In some cases, a single RCD may protect multiple circuits. Ensure each device functions independently and isolates the intended area.
Tighten Electrical Connections
Loose connections can generate heat and cause failures:
- Turn off the main power
- Carefully check and tighten all screw terminals
- Look for signs of arcing or melted insulation
Electrical components naturally loosen over time due to vibration and thermal expansion. Someone with electrical training should perform this task to ensure all terminals are secure. Loose connections often present no visible signs but can lead to intermittent issues or equipment damage.
Professionals can use thermal imaging tools to identify loose or hot connections without dismantling the system. Such checks should be done during annual inspections to identify heat spots caused by terminal resistance.
Monitor For Overloads
Circuit breakers that trip frequently might indicate overloaded circuits:
- Check which appliances are connected
- Distribute power loads more evenly
- Upgrade the switchboard if necessary
Overloaded circuits hinder performance and can pose fire risks. An electrician can advise whether a switchboard upgrade is required based on usage patterns.
If new appliances are installed or the building usage changes, reassess the power distribution. Frequent trips should never be ignored. It may be necessary to install dedicated circuits for high-load appliances such as air conditioners, ovens, or pool equipment.
Overloads can also be caused by faults in appliances themselves, so it is essential to identify the source of repeated tripping.
Ensure Proper Ventilation
Switchboards should be installed in well-ventilated, dry areas:
- Avoid storing items around the board
- Ensure vents are not blocked
- Consider installing a cabinet with airflow openings
Poor ventilation can cause heat buildup, which reduces component lifespan and may result in failures. An optimal installation location can mitigate these risks. Never store flammable materials such as paint cans, cardboard boxes, or cleaning chemicals nearby.
Consider additional ventilation or passive cooling measures if the switchboard is installed in a confined space. Heat is the enemy of electrical performance. Excessive temperature can cause insulation to degrade and increase the risk of faults.
Schedule Professional Inspections
Have a licensed electrician perform a comprehensive check annually. They will:
- Use thermal imaging to identify hotspots
- Test all safety devices and breakers
- Assess whether upgrades are necessary
Professional inspections add a layer of expertise that ensures nothing is overlooked. Trained eyes can spot early indicators that a non-specialist might miss. Annual checks are also an opportunity to verify compliance with current safety regulations.
Ask your electrician to review the switchboard’s capacity against your energy consumption. They may recommend upgrading protection devices or redistributing load across circuits. This proactive approach can prevent unexpected shutdowns or damage to valuable equipment.
During these inspections, ensure the switchboard complies with the latest AS/NZS 3000 Wiring Rules. Outdated wiring methods or components can be a liability.
Maintenance Schedule Overview
Monthly:
- Visual inspection for damage or wear
- Cleaning around the switchboard
Quarterly:
- RCD testing
- Inspection for pest intrusion
Annually:
- Full professional inspection
- Load balancing assessment
Every 5–10 Years:
- Consider a switchboard upgrade depending on condition and load requirements
This schedule can help avoid sudden breakdowns and ensure your electrical system runs efficiently.
Preventive Measures To Enhance Safety
Install Surge Protectors
They safeguard electronics from voltage spikes caused by storms or power surges. These small devices can prevent significant damage to your switchboard and connected appliances.
Label All Circuits
Labelling circuits helps in quick fault identification and safer management. Labels should be clear, durable, and updated when circuits are modified.
Avoid DIY Repairs
Unqualified repairs can be dangerous and may void insurance. Always engage a licensed electrician for maintenance, repairs, or upgrades to ensure work is safe and compliant with local regulations.
Secure Access
Keep the switchboard locked or in a cabinet to prevent tampering or unauthorised access. This is particularly important in shared or commercial premises.
Conclusion
Maintaining your electrical switchboard is not complex but demands consistency and awareness. By following a structured schedule and involving professionals when needed, you can avoid common pitfalls and ensure a safe, efficient electrical system.
Taking care of your switchboard is not only about preventing faults. It also supports energy efficiency, ensures smoother appliance performance, and extends the life of your entire electrical infrastructure. Treating maintenance seriously reflects a proactive approach to property management.
Frequently Asked Questions
How Often Should I Inspect My Electrical Switchboard?
You should visually inspect your switchboard monthly to check for signs of wear, damage, or pests. In addition, a licensed electrician should perform a comprehensive inspection annually to ensure all components function safely and efficiently.
What Does It Mean If My Circuit Breakers Trip Frequently?
Frequent tripping usually indicates an overloaded circuit or a fault with an appliance. It can also signal that your switchboard is outdated and struggling to handle your current electrical demands. A professional assessment can identify the exact cause and suggest solutions.
Can I Clean Or Maintain The Switchboard Myself?
You can perform basic tasks like wiping dust from the exterior and checking for visible issues, but a licensed electrician should do any internal cleaning or electrical work. This ensures safety and prevents voiding warranties or breaching legal requirements.
How Do Local Removalists Handle Traffic Challenges In Melbourne?
Melbourne, known for its bustling city life and iconic culture, is also known for heavy traffic. This can pose significant challenges for removalists who must navigate the city’s roads and deliver goods promptly and safely.
Traffic congestion, roadworks, and unpredictable weather conditions can all complicate the job for local removalists. However, with their extensive experience and local knowledge, they have developed various strategies to manage these challenges efficiently.

Check out our website for helpful tips and detailed content to make your move smoother despite Melbourne’s traffic.
Understanding Melbourne’s Traffic Landscape
Melbourne’s traffic can be a maze of challenges, especially for removalists who must travel through different neighbourhoods, deal with parking restrictions, and ensure their trucks navigate busy streets. The city’s roads are often congested, particularly during peak hours, which can delay removal.
Key Factors Impacting Traffic In Melbourne
- Peak Traffic Hours
Like many major cities, Melbourne experiences peak traffic periods during mornings (7-9 AM) and afternoons (4-6 PM). During these times, major routes, including the Monash Freeway and CityLink, can become gridlocked, making it difficult for removalists to reach their destination quickly. - Roadworks and Construction Zones
Melbourne is constantly under development, and roadworks are a regular occurrence. These ongoing projects can significantly reduce the number of available lanes, causing further congestion and delays for removalists. - Accidents and Road Closures
Accidents, whether minor or severe, can disrupt traffic flow. When accidents occur on key routes or intersections, removalists may find themselves stuck in traffic or forced to reroute, adding extra time to their schedules. - Public Events and Festivals
Melbourne hosts numerous events, such as the Australian Open, AFL games, and festivals, which can cause temporary road closures or increased traffic. Removalists need to be aware of these events when planning their routes. - Weather Conditions
Melbourne’s unpredictable weather, ranging from heavy rain to extreme heat, can impact driving conditions. Wet weather, for example, can slow traffic and make driving hazardous, while heat waves can affect the equipment and goods being moved.
How Local Removalists Plan For Traffic?
Local removalists in Melbourne are well-versed in the city’s traffic challenges. They employ various strategies to minimise delays and ensure timely deliveries.
Route Planning And Traffic Monitoring
One of the most effective ways removalists handle traffic challenges is through careful route planning. Before setting off, they use traffic monitoring tools and apps like Google Maps or Waze to check real-time traffic conditions. These tools update traffic congestion, accidents, and roadworks, allowing removalists to adjust their routes accordingly.
Tools Used By Removalists:
- Google Maps
This widely used app offers real-time traffic data, helping removalists identify the quickest routes and avoid congested areas. - Waze
Known for its community-driven updates, Waze allows users to share real-time information about accidents, police activity, and road closures. - Traffic Management Apps
Some removalists use specialised traffic management software that integrates live data from various sources, enabling them to adjust their plans on the fly.
By using these tools, removalists can avoid high-traffic areas and plan alternative routes, ensuring they meet their deadlines.
Scheduling Jobs During Off-Peak Hours
Another strategy employed by local removalists is scheduling moves during off-peak traffic hours. Most removalists prefer to schedule work for early mornings or mid-afternoons when traffic is lighter. This approach helps them avoid the congestion of rush hours, making the move more efficient.
Benefits Of Off-Peak Scheduling:
- Faster Travel Times: Reduced traffic allows for quicker movement across the city.
- Better Parking Availability: Finding parking spaces near the property becomes easier during off-peak hours.
- Less Stress for Removalists: Fewer cars on the road mean less stress navigating through Melbourne’s busy streets.
Use Of Smaller Trucks
While large removal trucks are essential for moving larger items, using smaller vehicles can be more advantageous when dealing with traffic challenges. Smaller trucks are more manoeuvrable and can easily navigate narrow streets or congested areas. This approach is particularly helpful in Melbourne’s inner suburbs, where parking spaces can be tight and traffic can be unpredictable.
Advantages Of Smaller Trucks:
- Better Accessibility: Smaller trucks can access locations that larger trucks cannot, particularly in crowded urban areas.
- Faster Parking: Finding a spot to park a small truck is much easier than parking a large removal truck.
- Less Road Congestion: Smaller vehicles contribute less to overall traffic congestion, making it easier for removalists to get from point A to point B.
Knowledge Of Local Shortcuts
Local removalists in Melbourne possess intimate knowledge of the city’s streets and hidden shortcuts. These shortcuts are often not found on navigation apps but are well-known to locals. Removalists can bypass major roads and avoid traffic bottlenecks by utilising these routes.
Common Shortcuts And Strategies:
- Local Streets and Alleys: In densely populated areas, taking smaller, less busy streets can help removalists save time.
- Public Transport Lanes: Depending on the regulations, removalists may be able to use lanes reserved for public transport in some cases.
- Bypass Roads: Roads like the Western Ring Road or Eastern Freeway often provide faster routes than city streets.
Real-Time Communication With Clients
Effective communication with clients is essential for overcoming traffic challenges. Removalists keep their clients updated on their expected arrival times, especially if they anticipate traffic delays. By maintaining open lines of communication, clients can adjust their plans if necessary, reducing the pressure on removalists.
Benefits Of Real-Time Communication:
- Client Satisfaction: Keeping clients informed ensures they do not wonder about the arrival time.
- Flexibility: Clients may be able to make adjustments on their end if delays are expected.
- Avoiding Stress: Both the removalist and the client can plan accordingly, reducing stress on the day of the move.
Preparation For Unexpected Delays
Despite all the planning, traffic delays can still occur. Removalists in Melbourne always prepare for unforeseen circumstances. This may include having a buffer period built into the schedule to account for unexpected delays, such as accidents or sudden weather changes.
How Removalists Prepare:
- Time Buffers: Allowing extra time between appointments helps ensure that one delay doesn’t affect the entire schedule.
- Contingency Plans: Removalists have backup routes and alternative solutions if the original plan is disrupted.
- Vehicle Maintenance: Ensuring the vehicle is in optimal condition helps avoid breakdowns and delays during the move.
Technology’s Role In Traffic Management For Removalists
Technology is increasingly playing a significant role in helping removalists manage traffic challenges. From GPS tracking to real-time updates, technological advancements have made it easier for removalists to stay on top of traffic conditions and plan accordingly.
Benefits Of Technology In Traffic Management:
- Real-Time Traffic Data: Apps like Google Maps and Waze provide live updates on traffic conditions, helping removalists avoid delays.
- GPS Fleet Tracking: Fleet tracking systems enable removalists to monitor their vehicles in real time, ensuring they stay on schedule.
- Automated Scheduling: Some removalists use software to automatically schedule jobs based on traffic data, ensuring the most efficient routes are selected.
Conclusion
Handling traffic challenges in Melbourne is no easy task, but local removalists have developed effective strategies to ensure smooth and timely moves. Removalists can minimise delays and provide better client services by planning routes, avoiding peak traffic hours, using smaller trucks, and relying on their local knowledge.
With the help of technology, removalists are more equipped than ever to handle Melbourne’s traffic, making moving in this vibrant city a little less stressful.
Frequently Asked Questions
What Are The Busiest Traffic Times For Removalists In Melbourne?
The busiest traffic times in Melbourne are typically during peak hours, which occur from 7 AM to 9 AM and 4 PM to 6 PM. During these times, main roads and highways, such as the Monash Freeway and CityLink, experience heavy congestion. To avoid delays, many removalists prefer to schedule their jobs outside these peak hours, either early in the morning or mid-afternoon.
How Do Removalists Avoid Traffic In Melbourne?
Removalists in Melbourne use route planning and traffic monitoring tools, like Google Maps and Waze, to stay updated on real-time traffic conditions. They also leverage their local knowledge to take shortcuts and smaller streets that are less congested. Additionally, removalists can avoid heavy traffic by scheduling moves during off-peak hours and ensure a more efficient moving process.
Does Weather Affect The Timing Of A Move In Melbourne?
Yes, weather conditions can significantly impact the timing of a move in Melbourne. Heavy rain or extreme heat can slow traffic and make driving more hazardous. Removalists are well-prepared for such challenges, often allowing extra time for potential delays and keeping clients informed about any changes to the schedule due to weather-related disruptions.
Top Things You Need When Applying For Truck Financing For A New Business
Starting a new business comes with several challenges, and one of the most significant hurdles is financing. Truck financing is crucial if your new venture involves transporting goods or running a freight operation.
Truck financing can help ease the burden of buying a truck, but the process can be daunting without the proper preparation. Here are the top things you need when applying for truck financing for a new business.
Check here on our website for more help and resources.
A Solid Business Plan
Why Your Business Plan Matters
Lenders will look at your business plan when applying for truck financing as one of the most essential documents. A well-written and detailed business plan demonstrates to potential lenders that you understand your business and its future potential. It also highlights the steps you plan to make your new business profitable.
A solid business plan should include:
- Business Overview: Provide a clear description of what your business does.
- Market Analysis: Show that you understand the industry and target market.
- Financial Projections: Demonstrate your expected revenue, expenses, and profits.
- Funding Requirements: Outline how much financing you need and how it will be used.
How It Impacts Your Loan Approval
Lenders want to know they are lending to a business with a realistic chance of success. A comprehensive business plan can increase your chances of securing financing by assuring lenders that your new business is well thought out and has growth potential.
Proof Of Income And Cash Flow
Understanding Lenders’ Expectations
Lenders will want proof of income and cash flow for truck financing. Even if you are a new business owner, lenders will want to know how you plan to make consistent payments. If you have been in business for a short time, providing a record of your cash flow and showing how you plan to generate income will be helpful.
What You Should Prepare
- Personal Income Statements: If your business is in its infancy and does not have a strong financial history, your income statements may be needed.
- Cash Flow Projections: These projections should be realistic and show how much money you expect to bring in over the next few months or years.
Impact On Your Loan Application
Solid proof of income and cash flow shows lenders that your business can manage the loan payments. Even though cash flow projections may be speculative for a new business, providing reasonable figures can still help lenders assess your financial stability.
Your Credit Score And History
Why Credit Score Matters
Your credit score is one of the primary factors that lenders use when assessing whether to approve your truck financing application. A strong credit score increases your chances of receiving favourable loan terms. Lenders will also examine your credit history to assess your ability to repay debts.
What You Need To Know About Your Credit
- Personal Credit Score: For new businesses, lenders may look at the business owner’s credit score.
- Business Credit Score: If your business has a credit history, lenders will also review your business credit score.
- Credit History: Lenders will assess how well you have managed debt in the past, so ensure that your credit report is clear of any negative marks.
Steps To Improve Your Credit
If your credit score is low, taking steps to improve it before applying for financing is essential. Pay down outstanding debts, make timely payments, and avoid taking on new debt until your score improves.
Business Documentation
What Documents Do You Need
In addition to your business plan and financial documents, you must provide several other documents to secure truck financing. These documents help lenders assess the legitimacy and financial health of your business.
Documents you will need include:
- Australian Business Number (ABN): Prove your business is registered with the relevant authorities.
- Tax File Number (TFN): This number identifies your business for tax purposes.
- Proof of Insurance: Lenders often require proof of insurance to protect their investment in case of accidents or damage to the truck.
Why These Documents Matter
These documents prove your business is legitimate and has met all necessary legal and financial obligations. They also show lenders that your business is well-organised and serious about securing the financing it needs.
Down Payment
Why A Down Payment Is Important
A down payment is often required when applying for truck financing. The amount of the down payment can vary depending on the lender and the type of loan. A substantial down payment reduces the amount you need to borrow, making you a less risky borrower in the eyes of the lender.
How Much Should You Prepare?
- Down Payment Percentage: You can expect to pay 10% to 20% of the truck’s purchase price as a down payment.
- Negotiating the Down Payment: Some lenders may allow a smaller down payment, but if you put down less money, be prepared for a higher interest rate or stricter loan terms.
Impact On Financing Terms
A larger down payment may result in better loan terms, such as lower interest rates or more flexible repayment periods. However, you’ll need to assess your business’s finances to determine how much you can afford to put down without putting a strain on your cash flow.
Collateral For The Loan
What Is Collateral?
Lenders often require collateral for truck financing. Collateral is a security for the loan if you default on the payments. In the case of truck financing, the truck itself is often used as collateral.
What You Need To Know About Collateral
- Truck as Collateral: The truck you purchase may be used as collateral, meaning the lender can repossess it if you fail to make payments.
- Other Collateral: If your business has assets, such as real estate, equipment, or inventory, these may also be considered collateral.
How Collateral Affects Your Loan
Using collateral can make it easier to obtain financing, as it reduces the lender’s risk. However, you should carefully consider whether you are comfortable putting up assets that could be seized if you miss payments.
The Right Lender
Choosing The Right Lender For Your Business
Not all lenders offer the same terms or have the same approach to financing. Choosing a lender who understands your business needs and offers competitive terms is essential. Different types of lenders include:
- Banks: Traditional banks may offer competitive interest rates, but have strict qualification requirements.
- Non-Bank Lenders: These lenders may be more flexible with their terms but may charge higher interest rates.
- Specialised Truck Lenders: Some lenders specialise in truck financing and may offer tailored solutions for businesses in the transportation industry.
How To Choose The Best Lender
- Compare Rates and Terms: Always compare different lenders to find the best interest rates, loan terms, and repayment schedules.
- Look for Industry Expertise: Consider working with lenders with truck financing experience. They will be more likely to offer the best advice and terms.
Conclusion
Preparation is key when applying for truck financing for your new business. A solid business plan, proof of income, a strong credit history, and the proper documentation will all improve your chances of securing the financing you need.
Consider down payments and collateral, and choose the right lender to ensure you get the best terms possible. With the proper preparation, you can secure truck financing and take your new business to the next level.
Frequently Asked Questions
Can I Get Truck Financing If My Business Is Brand New And Has No Financial History?
Yes, it is possible to secure truck financing even if your business is new. To assess your eligibility, Lenders may consider your credit score, income, and business plan. Having a strong down payment and providing realistic cash flow projections can improve your chances. Some lenders specialise in financing startups and may offer more flexible terms.
What Type Of Documents Do I Need To Apply For Truck Financing?
You’ll need your business registration, proof of income, tax identification number, insurance documents, and a detailed business plan. If your business is new, personal financial information may also be required. These documents help the lender evaluate your business’s legitimacy and repayment ability.
Is A Down Payment Always Required For Truck Financing?
While most lenders require a down payment, the amount can vary. It’s usually around 10% to 20% of the truck’s value. A larger down payment can help you secure better loan terms and show the lender that you’re committed to the investment. Some financing companies may offer low or no-deposit options, but often at higher interest rates.
How Can You Use Composite Decking Creatively?
Composite decking is a versatile and durable material that can be used in various creative applications around the home. It offers the appearance of wood but is far easier to maintain, as it is resistant to rot, splinters, and fading.

With its eco-friendly properties and variety of styles, composite decking is an excellent choice for creative projects in both indoor and outdoor spaces. This article will explore how you can use composite decking creatively to enhance your home and outdoor spaces.
Explore this page on my website to help you bring your creative projects to life.
Multi-Level Decks
Why Multi-Level Decks Are A Great Option
One of the most creative ways to use composite decking is by constructing multi-level decks. These decks work well in uneven or sloped areas, allowing you to maximise usable space and design areas for different activities. Whether you want to create a dining area, lounge zone, or a dedicated space for outdoor cooking, multi-level decks help to separate and organise these spaces, making your outdoor living area more functional and visually appealing.
How To Build A Multi-Level Deck With Composite Decking
- Plan the layout: First, consider the size and shape of the area. Sketch a design for the deck, considering how many levels you want and where each level should be positioned.
- Use composite decking for structure and finish: Composite materials are strong enough to serve as both the structural support and the deck’s surface. To create a modern look, you can combine these with other materials, such as stainless steel for railings.
- Incorporate lighting: Adding lighting to each level can enhance the mood and safety of the space. LED lights can be installed along the steps or railings, creating a visually striking effect at night.
- Design each level with a purpose: Ensure that each level of the deck serves a distinct purpose. For example, the first level could be for dining, while the second level could provide a space for relaxation, featuring lounge chairs or a hammock.
Outdoor Furniture Made From Composite Decking
Custom Outdoor Furniture Using Composite Decking
Composite decking is a durable material that can also be used to create custom outdoor furniture. Instead of buying expensive pre-made furniture, you can use composite decking to build your pieces, such as benches, tables, and chairs. The material’s durability ensures that the furniture will last for years with little maintenance, even in harsh weather conditions.
Ideas For Composite Decking Furniture
- Benches: Build a simple bench using composite decking boards. This can be placed along the edge of a deck or in the middle of a garden for additional seating.
- Dining tables: A sturdy composite decking table is perfect for outdoor dining. Its resistance to moisture and fading makes it ideal for use in the backyard.
- Lounge chairs: Create lounge chairs using composite decking as the base, with comfortable cushions on top for a laid-back outdoor experience.
Raised Garden Beds
Composite Decking As Raised Garden Beds
Composite decking is ideal for creating raised garden beds. Unlike wood, which can rot and deteriorate over time, composite decking is resistant to water, rot, and pests, making it an excellent choice for garden structures. Raised garden beds made from composite materials also provide better soil drainage and can be positioned at a height that makes gardening easier on your back.
How To Build A Raised Garden Bed With Composite Decking
- Choose the right composite material: Select composite decking boards designed to withstand outdoor conditions and large enough to create sturdy garden bed sides.
- Prepare the site: Choose a location with enough sunlight and good soil quality. Clear the area of any grass or debris.
- Construct the frame: Using composite decking boards, build the frame for the garden bed. Secure the boards with screws or brackets to ensure stability.
- Fill with soil: Line the inside of the bed with a weed barrier, then fill it with quality garden soil.
- Plant your garden: Add flowers, vegetables, or herbs.
Composite Decking Fencing
Why Composite Decking Works For Fencing
Composite decking materials are an excellent choice for creating fences. They are sturdy and durable and provide a sleek, modern look that complements various outdoor aesthetics. Composite decking fences resist weathering, ensuring long-lasting beauty without frequent maintenance.
How To Build A Composite Decking Fence
- Choose the right composite material: Select composite decking boards that match the design of your home and outdoor area. You can opt for boards that mimic the look of wood or choose a more contemporary finish.
- Design the fence layout: Decide on the height and width of the fence based on your privacy needs and design preferences.
- Install the posts and rails: Secure the fence posts in the ground and attach composite decking boards to the rails to create the panels.
- Add finishing touches: To enhance the look, you can add decorative elements such as caps for the posts or built-in lighting for a modern touch.
Composite Decking Walkways And Pathways
How To Use Composite Decking For Walkways
Composite decking can also create stylish and functional walkways in your garden or yard. It provides a smooth, slip-resistant surface that guides guests through your outdoor space. These walkways can complement your garden design, adding both practicality and beauty.
How To Build A Walkway Using Composite Decking
- Plan the path: Design a curved or straight path to lead visitors through your garden, creating a natural flow.
- Use composite decking for the boards: Lay composite decking boards across the path, using them to create a sturdy, long-lasting walkway.
- Add edging: To add a finishing touch, you can frame the walkway with natural stones, bricks, or additional composite decking.
Planters Made From Composite Decking
Creative Composite Decking Planters
Another excellent way to use composite decking is to create custom planters. Composite decking is sturdy enough to hold large plants, and its resistance to moisture makes it perfect for outdoor planters. These planters can be used in gardens, along walkways, or on your deck to add greenery and vibrancy.
How To Build Composite Decking Planters
- Design the planter: Choose the size and shape of the planter that will best suit your outdoor space.
- Construct the frame: Use composite decking boards to create the planter’s sides. Secure them together with screws or brackets.
- Line the planter: Line the inside with a plastic liner to prevent soil from seeping through the cracks.
- Add plants: Fill the planter with soil and your choice of plants, whether flowers, herbs, or small shrubs.
Conclusion
Composite decking is a highly versatile material that can be used creatively in many applications around your home and garden. Whether you want to build multi-level decks, design custom outdoor furniture, or create stylish raised garden beds, composite decking provides aesthetic appeal and durability.
With its long-lasting, low-maintenance properties, composite decking can help transform your outdoor spaces into functional and beautiful areas you can enjoy for years.
Frequently Asked Questions
Is Composite Decking More Expensive Than Wood Decking?
While composite decking tends to have a higher upfront cost than traditional wood decking, it offers long-term savings due to its durability and low maintenance requirements. Composite decking doesn’t need regular staining or sealing, which reduces maintenance costs over time. Additionally, its resistance to rot and splinters means fewer repairs, making it a cost-effective investment in the long run.
Can Composite Decking Be Used For Both Outdoor And Indoor Projects?
Yes, composite decking is a versatile material that can be used in both outdoor and indoor settings. Due to its weather resistance, it is particularly popular for outdoor applications such as decks, garden beds, and fences. Inside, it can be used for features like feature walls, indoor benches, or custom furniture projects, providing a modern and low-maintenance aesthetic.
How Do I Maintain Composite Decking?
Maintaining composite decking is straightforward. Regularly sweep away debris to prevent dirt buildup, and wash the surface with warm soapy water when necessary. Unlike wood, composite decking does not require staining, sealing, or sanding, but it’s a good idea to inspect for any damage occasionally, especially after severe weather. This makes it a low-maintenance option compared to traditional wood decking.
Where Should The Laughing Buddha Be Placed?
The Laughing Buddha, an iconic symbol known for representing happiness, prosperity, and good fortune, has been a popular figure in homes, offices, and businesses across the globe. It is widely believed that the Laughing Buddha can bring luck, wealth, and positive energy, making it a common addition to various settings.

However, there are specific guidelines regarding the placement of the Laughing Buddha in your home, especially regarding the bedroom. This article will explore how to position the Laughing Buddha and discuss whether keeping it in the bedroom is appropriate.
Check out our great site for more tips and advice on this topic.
Placement Guidelines For The Laughing Buddha
The Importance Of Placement In Feng Shui
Feng Shui, the ancient Chinese practice of harmonising individuals with their environment, plays a significant role in determining the proper placement of the Laughing Buddha. According to Feng Shui principles, properly placing this figurine can help enhance its positive effects, whereas improper placement might hinder its benefits.
Where Should The Laughing Buddha Be Placed?
When considering where to place the Laughing Buddha, there are a few general guidelines to follow:
- Face the Main Door: It is recommended that the Laughing Buddha be placed facing the main door to welcome wealth and positivity into the home. This placement allows the figurine to channel its energy into the house, inviting prosperity.
- Place on a High Surface: The figurine should be placed on a clean, elevated surface, away from electronic appliances, which are believed to disrupt the positive energy the Buddha is supposed to bring.
- Ideal Direction: The Laughing Buddha should be positioned facing east or south-east for the best results regarding wealth and happiness.
Can I Keep Laughing Buddha In The Bedroom?
While the Laughing Buddha can bring positive energy, there are some places in the home where its presence may be more beneficial than others. The bedroom, in particular, is often considered an inappropriate place for this figurine.
Reasons Against Placing Laughing Buddha In The Bedroom
- Energy Disruption: The bedroom is a place for rest, and it is essential to maintain a peaceful atmosphere. The Laughing Buddha, associated with active energy, may disrupt the calming atmosphere for sleep.
- Relationships: In some cultures, placing the Laughing Buddha in the bedroom may interfere with the balance of energies between partners, as it is considered a highly energetic figure. This could lead to misunderstandings or disturbances in personal relationships.
- Potential Negative Impact: In Feng Shui, the bedroom is meant to be a sanctuary for rest. A Laughing Buddha, which is linked to wealth and external success, might shift the focus away from inner peace and affect the flow of restful energy in the room.
Exceptions To The Rule
While it is generally discouraged, some believe that the Laughing Buddha can be kept in the bedroom if placed in a strategic location. It is essential to ensure that the figure faces away from the bed to avoid directly influencing the sleeping area. However, this placement should be carefully considered and is not universally recommended.
What About The Kitchen And Dining Area?
The kitchen and dining area are also not ideal for the Laughing Buddha. These areas are associated with nourishment and family bonding rather than material wealth. Placing the Laughing Buddha here could disturb the energy balance, making it less effective in inviting prosperity.
Placement Tips For Optimal Benefits
In The Living Room
The living room is one of the best places to place the Laughing Buddha, as it is a central area where guests and family gather. Facing the main door, the Laughing Buddha is believed to bring happiness and good fortune to all who enter the house. It can be placed on a clean surface or an altar, but care should be taken to avoid placing it near electronic devices or clutter.
In The Office Or Business
The Laughing Buddha is often kept in business to attract success and prevent competition. It should be positioned on the desk or near the entrance, facing the person concerned, to help them realise their goals and ensure prosperity. The Buddha should not be placed in the office’s bathroom or near a toilet, as these areas are considered sources of negative energy.
Additional Guidelines For Laughing Buddha Placement
Do Not Place On The Floor
The Laughing Buddha should never be placed directly on the floor. This is seen as a sign of disrespect in many cultures, as the figure is associated with wealth and prosperity. It should always be placed on a higher surface to remain elevated and respected.
Avoid Overcrowding
While placing multiple figurines or items around the Laughing Buddha may be tempting, it is important not to overcrowd the space. Clutter can interfere with positive energy flow, making it less effective in bringing prosperity.
Use Of Coins For Added Prosperity
A traditional Feng Shui practice involves placing a one-rupee or a small coin beneath the Laughing Buddha for added wealth and financial stability. This is said to enhance the Buddha’s influence and bring more prosperity to the home.
Conclusion
While the Laughing Buddha is a powerful symbol of happiness, prosperity, and good fortune, it is essential to fully benefit from its positive energy in the right areas of the home. Keeping it in the bedroom, kitchen, or dining area may disrupt the energy balance of these spaces.
It is best to place the Laughing Buddha in the living room, office, or facing the main door to ensure that it attracts wealth and happiness without causing adverse effects. By following the guidelines for proper placement, you can harness the full potential of the Laughing Buddha in your home.
Frequently Asked Questions
Can I Place The Laughing Buddha In My Bedroom?
While keeping the Laughing Buddha in the bedroom is generally not recommended due to its energetic qualities, it can be placed under certain conditions. It should be positioned away from the bed and facing away from the sleeping area to avoid disrupting the restful energy. Ideally, it is better to place it in the living room or office to attract prosperity without affecting the peaceful atmosphere of the bedroom.
What Is The Best Direction To Place The Laughing Buddha?
The Laughing Buddha is best placed facing the house’s main door, which is believed to attract good fortune and positive energy. Feng Shui experts recommend positioning the figurine in the East or South-East direction to enhance wealth and happiness. Place it on an elevated surface to maintain energy and avoid clutter.
Can I Keep Multiple Laughing Buddha Figurines At Home?
It is not recommended to overcrowd your home with too many Laughing Buddha figurines, as this can interfere with positive energy flow. A single, strategically placed Laughing Buddha can bring prosperity and good fortune. Ensure it is placed in a clean, clear area with minimal distractions to maximise its beneficial effects.
Which Equipment Requires Test And Tag Services?
Electrical safety starts with knowing which devices demand regular checks. From tools on construction sites to everyday office equipment, each item carries potential risks if left unchecked. Test and tag services ensure appliances meet safety standards, reducing the chance of electrical faults, injuries, or downtime. But not all gear faces the same wear and tear—some need frequent inspection, others less so.
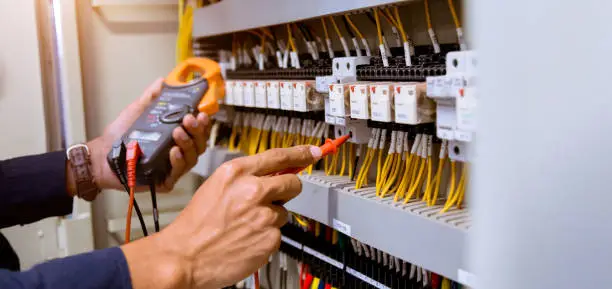
Recognising what needs testing, and when, is essential for maintaining a safe and compliant environment. This blog breaks down the key types of equipment that require testing and tagging, helping you stay proactive and avoid preventable hazards.
If you’re looking for reliable portable appliance testing services, we can help ensure your mobile equipment is safe, compliant, and ready for use.
Equipment Requiring Test And Tag Services
Ensuring electrical safety in workplaces and commercial settings is critical to occupational health and safety compliance. One of the most effective ways to maintain this safety is through regular test and tag services, which involve inspecting electrical appliances for damage and verifying that they meet safety standards.
This process includes visual inspections, electrical testing with specialised instruments, and applying a tag to show that the appliance has passed the test and when the next test is due.
Various types of electrical equipment require periodic testing and tagging, depending on their environment and usage. Below is a comprehensive breakdown of the most common equipment categories that must undergo this essential safety procedure.
Portable Electrical Appliances
Portable electrical appliances are devices that can be easily moved and are typically connected to the power supply via a flexible cord and a plug. These appliances are ubiquitous in homes, offices, construction sites, and commercial kitchens.
Examples include:
- Power tools such as drills, grinders, sanders, and jigsaws
- Extension leads, power boards, and double adaptors
- Kitchen appliances like kettles, toasters, blenders, and sandwich presses
- Office equipment, including computers, monitors, printers, and shredders
Why Testing is Important: Portable appliances are more susceptible to wear and tear due to frequent relocation, cord coiling and uncoiling, and constant plugging in and out. Damaged cords, exposed wires, or compromised insulation pose severe electric shock or fire risks.
Regular testing and tagging help identify these risks early, preventing potential accidents and ensuring compliance.
Construction And Industrial Equipment
Electrical equipment is exposed to some of the harshest operating conditions in construction and industrial environments. It often operates in outdoor environments or rugged job sites, with exposure to dust, moisture, vibration, and physical impact.
Key equipment includes:
- Heavy-duty power tools such as jackhammers, circular saws, and concrete mixers
- Portable Residual Current Devices (RCDs), which are vital for personal protection
- Three-phase equipment used for high-power industrial applications
Why Testing is Important: Given the hazardous nature of construction and industrial work environments, the risk of electrical accidents is significantly higher. Damaged equipment can lead to electrocution, equipment failure, or fires.
Therefore, as safety regulations mandate, construction tools and site equipment typically require testing every three months. Ensuring these appliances function correctly is about regulatory compliance, protecting lives, and maintaining operational continuity.
Office And IT Equipment
Office settings may not seem dangerous, but electrical faults can still occur in a seemingly safe environment. Electrical failures in office equipment can lead to data loss, system downtime, or even fire hazards.
Common equipment includes:
- Desktop computers and servers
- Monitors and docking stations
- Photocopiers, fax machines, and shredders
- Chargers and power supplies
Why Testing is Important: These devices may not undergo the same physical stress as construction tools, but internal faults, dust accumulation, or overheating can still cause hazards.
The testing frequency is typically every 12 months, though this can be extended in low-risk settings, such as equipment in secured IT server rooms, which may only need testing every five years. Even in low-risk areas, routine testing remains crucial to preventative maintenance strategies.
Kitchen And Hospitality Appliances
The hospitality industry relies heavily on various electrical appliances continuously throughout the day. Restaurants, hotels, and cafes often operate equipment near moisture, heat, and combustible materials.
Typical equipment includes:
- Commercial ovens and stovetops
- Coffee machines and espresso machines
- Microwaves and convection ovens
- Refrigerators, dishwashers, and drink dispensers
Why Testing is Important: The intersection of water and electricity significantly increases the risk of electric shock. Moreover, food preparation environments must meet health and safety regulations, and equipment failure can result in food spoilage or contamination.
Testing and tagging are crucial in these settings and should be conducted regularly—usually every six months—to ensure safety, maintain appliance efficiency, and avoid service disruptions.
Medical And Laboratory Equipment
Medical and laboratory environments utilise highly sensitive and critical devices where failure is not an option. These environments also often involve vulnerable patients, requiring equipment to function flawlessly at all times.
Key equipment includes:
- Diagnostic devices such as ECG machines, X-ray units, and MRI machines
- Laboratory analysers and testing stations
- Sterilisation equipment, including autoclaves and UV sanitation systems
- Portable equipment used for home visits or mobile clinics
Why Testing is Important: Due to its critical function, any malfunction can directly impact patient safety and test results. The testing standards for medical equipment are stricter and require more frequent testing and logging.
Testing intervals are often as short as every three to six months, depending on usage and the environment. Ensuring that life-saving devices are electrically safe is not only a regulatory requirement but a moral imperative.
Conclusion
Testing and tagging of electrical equipment is a proactive safety measure that protects workers, prevents equipment failure, and ensures compliance with safety legislation. The diversity of settings and devices means testing programs must be customised, thorough, and consistently maintained. Companies that commit to these practices safeguard their operations and build a culture of accountability and care in the workplace.
Suppose you’re setting up a testing schedule or auditing your safety procedures. In that case, it’s essential to consult with a licensed and experienced test and tag service provider who can assess your unique equipment needs and regulatory obligations.
Frequently Asked Questions
How Often Should Electrical Equipment Be Tested And Tagged?
The frequency depends on the environment and the type of equipment. High-risk areas like construction sites require testing every 3 months, while low-risk office environments may only need it annually or every 5 years.
Is It Mandatory To Test And Tag Office Equipment?
Although office environments are generally low-risk, regular testing is required to ensure electrical safety. Devices like computers, printers, and power boards can develop faults over time. Testing every 12 months is a common standard for typical office settings.
Who Is Qualified To Perform Test And Tag Services?
Only a competent person trained under the AS/NZS 3760 standard can legally perform test and tag services. This includes licensed electricians or individuals who have completed an accredited test and tag training course. Proper tools and equipment are also required to carry out the process safely and accurately.
What Are The Top Materials For Durable Verandah Construction?
Constructing a verandah is a popular addition for many Australian homeowners. It creates a space where family and friends can gather, enhances property value, and offers shelter from the elements. Choosing the right construction materials ensures this space is functional and lasting.

This article explores the best materials available for building a verandah in Australia, assessing their durability, maintenance, cost, and aesthetic appeal.
Click here to read the top material recommendations and expert tips, and start planning your ideal verandah.
Steel: Strength And Versatility
Colourbond Steel
Colourbond steel is widely regarded as one of Australia’s top materials used in verandah construction. It is known for its impressive resilience and modern appearance.
- Durability: Steel sheeting, particularly Colourbond, offers high resistance against weather impacts such as hail, strong winds, and intense sun. It outperforms materials like tiles, which may crack under impact.
- Low Maintenance: Unlike timber, steel doesn’t warp or rot and doesn’t require sealing or regular painting.
- Lightweight: The material is lighter than most traditional roofing options, making it easier and quicker to install.
- Aesthetic Options: Colourbond is available in a wide array of colours. This flexibility allows homeowners to match or contrast their verandah with existing exterior finishes.
- Cost-Effective: Despite its benefits, Colourbond is competitively priced and provides great value over the long term due to its longevity and minimal maintenance needs.
Colourbond’s affordability, low maintenance, and strength make it a smart long-term investment.
Timber: Natural Appeal With Considerations
Timber continues to be a favourite for those wanting a warm, natural aesthetic. However, it requires more upkeep than metal or composite materials.
Hardwood Options
For high-end verandah projects, hardwoods are commonly selected due to their rich texture and natural strength.
- Merbau: Highly durable and termite-resistant, Merbau is ideal for areas prone to pests and moisture.
- Spotted Gum: A dense Australian hardwood with natural resistance to rot and decay.
- Jarrah: Known for its deep reddish hue, it offers longevity in coastal environments but comes at a higher price.
Each hardwood option provides a unique character and long-term resilience if properly maintained. However, they require periodic sealing or oiling to maintain appearance and structural integrity.
Treated Pine
Treated pine offers a more affordable timber solution. It is chemically treated to resist rot and insects.
- Affordability: Less expensive than hardwoods, making it a good option for budget-conscious homeowners.
- Flexibility: Easily cut and shaped, ideal for custom verandah designs.
- Maintenance: While treated for decay, it still requires protective coatings and regular maintenance to prolong its life.
Pine is best for those wanting the look of timber without the high initial costs of hardwood.
Composite Materials: Low Maintenance And Eco-Friendly
Composite decking and structural materials blend wood fibres with recycled plastic. This innovative option suits those who prioritise sustainability and reduced upkeep.
- Durability: Resists fading, staining, scratching, and warping better than natural timber.
- Sustainability: Utilises recycled content, reducing environmental impact.
- Maintenance: Requires only occasional washing—no sanding, staining, or sealing.
- Consistent Finish: Offers a uniform appearance that won’t split or crack over time.
Composite materials are ideal for families looking to minimise maintenance while maintaining the look of wood.
Bamboo: Sustainable And Strong
Bamboo is becoming more prominent in outdoor construction thanks to its rapid growth and sustainability credentials.
- Eco-Friendly: Grows quickly and replenishes faster than hardwood forests.
- Durability: Strong and naturally resistant to pests and mould.
- Visual Appeal: Delivers a warm, modern look suitable for minimalist verandah designs.
- Cost and Availability: May be more expensive and harder to source than other materials in Australia.
While less common, bamboo offers a unique and sustainable alternative that works well in warm climates.
Concrete: Modern And Durable
Concrete is used primarily for verandah flooring but is also suitable for load-bearing elements in some designs.
- Stability: Offers a firm base that can withstand high foot traffic and furniture weight.
- Weather Resistance: Unaffected by termites, rot, or UV rays.
- Aesthetic Choices: Can be polished, stamped, or stained for different looks.
- Longevity: A well-poured slab can last decades without significant degradation.
Concrete floors can be customised with patterns and colours, adding a clean and contemporary finish to any verandah.
Glass: Elegant And Light-Filled
Glass is typically used for verandah roofing or enclosures, allowing more light and a feeling of openness.
- Transparency: Keeps the area bright and visually spacious.
- Style: Offers a sleek, sophisticated finish.
- Insulation Options: Can be double-glazed for better thermal efficiency.
- Cleaning: Requires more frequent cleaning than opaque roofing materials.
Glass adds elegance but may not be ideal in areas with heavy tree cover due to frequent cleaning needs.
Aluminium: Lightweight And Corrosion-Resistant
Aluminium is a lightweight metal used for structure and roofing in verandah designs.
- Corrosion Resistance: Excellent for coastal areas where salt can affect other metals.
- Maintenance-Free: Does not rust or need painting.
- Ease of Installation: Simple to cut and assemble, speeding up construction.
- Recyclability: Fully recyclable, making it an environmentally sensible choice.
Its neutral aesthetic makes it suitable for both contemporary and traditional designs.
Polycarbonate Roofing: Affordable And UV-Protective
Polycarbonate is a plastic roofing material commonly used in verandahs due to its low cost and practical benefits.
- Lightweight: Easier to handle and install than glass or metal.
- UV Protection: Blocks harmful ultraviolet rays while allowing light to pass through.
- Cost-Effective: Generally more affordable than glass or steel roofing options.
- Versatile Styles: Available in clear, tinted, and frosted finishes to suit various needs.
Polycarbonate roofing is a solid choice for homeowners seeking to control sun exposure without sacrificing light.
Conclusion
Selecting the right materials for verandah construction is a decision that combines function, budget, and design preferences. While Colorbond steel stands out for its low maintenance and high durability, timber remains a favourite for its natural beauty. Composite and aluminium offer modern, eco-conscious options, while concrete and glass bring a sleek and functional touch to any design.
Each material comes with unique strengths. When planning a verandah project, consider how each option suits your climate, maintenance preferences, and long-term goals. A well-chosen material not only extends the lifespan of your verandah but also enhances its usability and appearance for years to come.
Frequently Asked Questions
What Is The Lowest-Maintenance Material For Building A Verandah?
Composite materials and aluminium are considered the most low-maintenance options. Composite does not require painting, sealing, or staining; it resists rot and pests. Aluminium is rust-proof, doesn’t need repainting, and holds up well in coastal or humid environments.
Is Timber A Good Choice For Verandahs In Coastal Areas?
Timber can be used in coastal areas, but hardwoods like Jarrah or Spotted Gum are better suited due to their natural resistance to moisture and decay. However, even these will need regular maintenance, such as sealing or oiling, to withstand the harsh coastal climate.
Which Roofing Material Is Best For Letting In Natural Light But Blocking UV Rays?
Polycarbonate roofing is ideal for this purpose. It allows sunlight to filter through while blocking harmful UV rays, making it perfect for bright, comfortable verandah spaces. It also comes in various finishes, like tinted or frosted, for additional light control.
Building A Carport On A Budget In Melbourne
Building a carport on a budget in Melbourne can be a practical and cost-effective solution to protect your vehicle from the elements. With the city’s varying weather conditions, a sheltered parking space is necessary. However, hiring a contractor or purchasing a pre-built carport can be expensive.

This guide will provide tips and insights on building a carport without breaking the bank.
For expert advice and affordable construction services, consider contacting Bowies Carport Builders, who specialise in creating high-quality, budget-friendly carports.
The Costs Of Building A Carport In Melbourne
Building a carport on a budget requires careful planning and understanding the cost factors. According to industry experts, the cost of constructing a carport can vary depending on several factors, such as size, materials, and location.
Key Cost Considerations
- Size of the carport:
- The larger the carport, the more materials and labour required, leading to higher costs.
- Typical sizes for single-car carports range from 3m x 6m, while double-car carports are often 6m x 6m or larger.
- Material choice:
- The material you choose for your carport will greatly affect the cost. Timber and steel are the most common materials used for carports. Timber is generally cheaper, but it requires more maintenance over time. Steel carports tend to be more durable but can be more expensive upfront.
- DIY vs Professional Installation:
- Opting for a DIY carport can significantly reduce costs. However, if you hire a professional, you’ll incur additional costs for labour and expertise.
- Permits and regulations:
- Depending on the location of your property, you may need to obtain a permit to build a carport. Permits can cost anywhere from $100 to $500 in Melbourne, so check with your local council before beginning construction.
Cost Breakdown: Materials And Labour
- Timber Carport: Timber carports can cost between $1,500 and $5,000, depending on the materials used and the complexity of the design.
- Steel Carport: Steel carports can range from $2,000 to $7,000 for a single-carport structure, with larger or more intricate designs costing more.
- Labour Costs: If you hire a contractor, labour costs can make up a significant portion of the total price. On average, you can pay between $50 and $100 per hour for professional installation.
Steps To Building A Carport On A Budget In Melbourne
Now that you have a general understanding of the costs involved, let’s walk through the steps of building a carport on a budget.
1. Plan Your Carport Design
The first step in building a carport on a budget is to decide on the design. Here are some key considerations for your design:
- Carport Size: Determine whether you need a single-car or double-car carport. A single-car carport is sufficient for most homeowners, but a double-car carport may be necessary if you have more than one vehicle.
- Roof Style: Choose between a flat roof or a gabled roof. A flat roof is more affordable and easier to construct, while a gabled roof offers better water drainage and a more traditional aesthetic.
- Open or Closed Carport: Decide whether you want an open carport or one with partial walls. An open design is cheaper, as it requires fewer materials.
2. Choose Affordable Materials
Selecting the right materials can help you keep costs low. Here are some affordable options:
- Timber: Timber is one of the most affordable carport materials. However, it does require regular maintenance to prevent weathering and rotting. Timber can be used for both the frame and the roof structure.
- Steel: Steel is a more durable material but tends to be pricier. Consider budget-friendly options such as colourbond steel or corrugated iron roofing if you opt for steel.
- Polycarbonate Sheets: Polycarbonate sheets are an affordable roofing material that provides UV protection and can be more budget-friendly than metal roofing.
3. Consider A DIY Approach
Building a carport alone is one of the best ways to save money. By handling the construction yourself, you’ll eliminate the cost of hiring a contractor and can control the overall expenses.
However, this option requires a good understanding of construction and access to tools and equipment. If you’re not confident in your skills, professional help for critical tasks like securing the foundation or installing the roof is worth considering.
4. Gather Necessary Permits And Approvals
Before starting construction, check with your local council in Melbourne to see if you need any permits or approvals. Depending on your area and the size of the carport, you may be required to submit a development application. Make sure you adhere to any local building codes to avoid any complications down the line.
5. Construct The Carport Foundation
The foundation is one of the most important aspects of any construction project. For a carport, the foundation will support the structure’s weight and ensure its stability. Here are some common foundation types:
- Concrete Slab: A solid and durable option, concrete slabs provide a stable foundation for a carport. This is the most common choice for larger carports.
- Gravel or Crushed Rock: If you’re looking for a cheaper alternative, gravel or crushed rock can be used as a base. This is a cost-effective solution, but it may not provide as much stability as a concrete slab.
6. Build The Frame And Roof
Once the foundation is in place, the next step is to build the frame and roof. If you’re using timber, you’ll need to cut and assemble the frame, ensuring it’s level and square. Once the frame is in place, you can attach the roofing material.
If you opt for a steel carport, assemble the steel frame and attach the roof sheets. Make sure the roof is angled correctly to ensure water runs off efficiently.
7. Add Finishing Touches
Once the frame and roof are up, you can add finishing touches like painting or staining the wood to protect it from the elements. You may also install gutters and downpipes to prevent water from collecting around the carport.
Is It Cheaper To Build Your Carport?
A common question when planning to build a carport is whether it’s cheaper to build it yourself or hire a professional. Experts say DIY carport construction can be significantly cheaper than hiring a contractor. However, this depends on your skill level and the time you can invest in the project.
Pros Of Building Your Carport:
- Lower costs: You’ll save money on labour by eliminating the need for a contractor.
- Customisation: You can tailor the design to suit your needs, whether a simple shelter or a more elaborate structure.
- Satisfaction: There’s a sense of achievement in completing a project independently.
Cons Of Building Your Carport:
- Time-consuming: Building a carport can take considerable time, especially with limited experience.
- Potential mistakes: Without professional expertise, there’s a risk of making mistakes that could affect the stability or safety of the carport.
Building your carport can be budget-friendly if you invest time and effort. However, if you’re unsure about your skills, hiring a professional may be a better choice for peace of mind.
Conclusion
Building a carport on a budget in Melbourne is achievable with careful planning and the right materials. You can save money by considering size, material choice, and whether to take a DIY approach while creating a functional and durable carport.
Whether you opt for timber, steel, or a combination of materials, following these steps will ensure you get the best value for your money. Check local council regulations and gather the necessary permits before starting construction.
Frequently Asked Questions
How Much Does Building A Carport In Melbourne Cost On A Budget?
The cost of building a budget-friendly carport in Melbourne can vary depending on factors like size, materials, and whether you choose to DIY or hire a professional. Building a simple timber carport can cost between $1,500 and $5,000, while steel carports range from $2,000 to $7,000. DIY options can significantly reduce costs, but it’s important to consider the time and skill required for the project.
Can I Build A Carport In Melbourne Or Hire A Contractor?
You can build a carport in Melbourne to save on labour costs. Many homeowners choose the DIY route for smaller or simpler carports, especially if they have basic construction skills. However, hiring a contractor may ensure better safety and compliance with local building regulations if the complex project involves significant structural work.
Do I Need A Permit To Build A Carport In Melbourne?
In Melbourne, most carport construction projects require a permit, especially if the carport exceeds certain dimensions or is near boundaries. It’s essential to check with your local council to confirm the specific requirements for your area. Obtaining the right permits ensures your carport complies with building codes and avoids any fines or complications in the future.